Monday, August 26, 2013

Banana Bread Muffins

Yeah yeah...I know...I finally decided to blog something again. Mostly because I'm so tired from cleaning my house this morning that I have no energy to do anything other than move my fingers across the keyboard lazily...but at least you get a GREAT recipe out of my laziness!

My favorite muffins my mom always made....
I pretty much always double the recipe or make 2 kinds of muffins because 12 doesn't split evenly by 7.

Cream softened butter and sugar

 And in everything else except the bananas

The best bananas are overripe
TIP: if you have overripe bananas (perfect for baking) but you don't have time to deal with them right now...
peel them and put them in zip bags and throw them in the freezer. They'll keep that way for a while. 
Just defrost, smash, and use in a recipe when you're ready.


Stir in the smooshed bananas

 Fill your muffin cups (the recipe makes 12 normal muffins, 6 jumbo, or a whole bunch of mini)

 Bake at 350 for about 30 minutes


Banana Bread Muffins

1  Cup Butter (2 sticks), softened (or ½ cup butter + ½ cup applesauce)*
1  Cup sugar
2  Eggs
2  Cups plain flour
2-3  Crushed Bananas (smash them on a plate with a fork)
1  tsp. Baking Soda

Cream sugar and butter.  Add eggs, then flour and baking soda.  (Last) Add crushed bananas. Pour into greased (or paper lined) 12 cup muffin pan. 


Bake at 350ºF for about 30 minutes.


I regularly use half butter half applesauce and I like these very sweet muffins just as good as if they were made with all butter.

I tried replacing all the butter (even though I knew that was probably not good for this recipe...just to see what it did) - they were edible, but they lost a lot of moistness and flavor. If you're going for skinny banana bread muffins...you might want to keep searching. :)


Monday, July 22, 2013

Doing good just to cook...

I had wonderful dreams of teaching my children to cook this summer - each one could have a night of the week and would learn basic skills like scrambling eggs or browning hamburger meat or layering things in a casserole (even the heat-fearing 6 year olds can do that)...

But alas, I'm doing good just to cook most days. (I still do, but dinner is frequently late) I'm so used to school demanding my schedule that without it, I'm a little slack (still more regular than the neighbor kids that bang on the back door at 7 asking if my (already bathed and fed children) can come outside and get all dirty with them and not get to bed on time...
rambling...

Anyways, I have nothing new to share, but I finally figured out how to make cute pancakes like my grandma used to make for me. (I think her famous was a mickey mouse with M&Ms for a face)...

My kids are animal lovers, so animals it is!
bear


bunny

It's not hard, really. (I say this after several years of screwing up bear pancakes)
Just pour the batter (I like mine thin) into a heated pan (just like for making pancakes), but pour slowly so you can control the shape.
unicorn #1
The tricky part is to flip carefully, but if it's fully cooked on one side and starting to dry well around the edges (and you use the biggest spatula you own), it works (I didn't ruin one animal)!
unicorn #2
While the second side is cooking, add decorations to the first (cooked) side. The chocolate chips melted just right while the pancake was in the pan cooking the other side.
a butterfly
Then carefully, slide a plate under the pancake as you lift with the spatula.

Should I make a how-to video? or a step-by-step picture tutorial?


Monday, July 15, 2013

Rice & Beans


I was looking for something new and different to cook, and I found a recipe that looked promising on pinterest.  I am always looking for new crock pot meals, because it's so nice not to have to worry about cooking in the evenings.  I changed it up a bit, and the results were blog-worthy.  Definitely a keeper.

Ingredients:

1 pound dry red beans
6 cups water
1 bell pepper (chopped)
3 celery stalks (chopped)
6 tbsp dried minced onion
3 tsp minced garlic
2 cans chicken broth
1 lb sausage
1 tbsp Tony's Creole Seasoning
Cooked Rice

1.  Rinse the beans in a strainer and pour them into the crock pot.  Add water & chicken broth.

2.  Add the chopped vegetables, dried onion, and garlic.  Slice the sausage into bite-sized pieces and add to the crock pot as well.

3.  Add the Creole seasoning and stir.  Cook on high for about 7 hours.  --The Creole seasoning adds quite a kick, so you may want to add even less if you don't like spicy food.  The original recipe called for 2 tbsp, but I only added 1 and it was still pretty strong.

4.  Serve over rice.

I was worried that my picky hubby wouldn't like it because of all the veggies, but you really don't notice them and the flavor is great!

Monday, June 24, 2013

Chocolate chocolate Chip Cookies

It's the normal cookie recipe...you know....

cream the butter and sugars...

add the eggs

get it smooth

I think light and fluffy is usually in the instructions somewhere? :)

and then all the dry stuff is added last - 
in fact, this is just the normal cookie recipe off of a package - just with 1/3 cup cocoa added to make it extra chocolately...mmmm....

and I use my mixer to stir in the chocolate chips
(which are sometimes white chocolate chips)

I usually use a normal little cookie scoop, but today I wanted big cookies so I used my mini muffin scoop (which funny enough doesn't work so well for mini muffin cups, but has come in handy for lots of other things).


Chocolate Chip Cookies 
(Nestlé Toll House, adapted)
1 cup unsalted butter, softened (That's 2 sticks)
¾ cup sugar
¾ cup packed brown sugar
1 tsp vanilla
2 eggs
2 ¼ cups all purpose flour
1 tsp baking soda
1 tsp salt
1/3 cup cocoa
1 pkg (12 oz) semi sweet chocolate chips

Preheat oven to 375°. 

In large mixing bowl, combine butter, sugars, and vanilla. Beat at medium speed until light and fluffy. Beat in eggs. 

(You're SUPPOSED TO: In a small mixing bowl, combine flour, baking soda and salt.)

But I just add all that to the mixer on top of the rest and turn it back on.
Beat at low speed until soft dough forms. Stir in chocolate chips.

Drop by heaping teaspoons 2 inches apart onto ungreased cookie sheets. Bake for 9-11 minutes, or until edges are golden brown. Cool completely before storing.


For inside out cookies, use white chocolate chips.


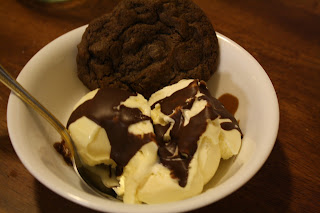
Everything's better with ice cream, right? :)


Wednesday, June 19, 2013

Omelets (Omelettes) by Minion-CIO

In honor of Father's day being this past Sunday, the one meal I CAN'T make that my husband can...
From here on out - his words/instructions - 
and maybe one day when I'm feeling brave again, I'll try them now that I have specifics on his method! :)

Advanced preparation is critical. Before heating any pans, be sure to cut and portion all vegetables, meats, cheeses, etc. The layer of egg is thin and cooks very quickly. If you pour the eggs and then turn around to cut some vegetables, by the time you go back to the stove, the bottom of the egg may have toasted already.

If you're going to add any crispy vegetables, I recommend sauteing them in the pan (with oil or water) or at least heating them up to soften them before adding them to the egg. The same goes with any meats added- they need to be fully cooked and chopped before being added.

Crack all eggs into a mixing bowl. 
Add enough milk to appear approximately equal to the volume of egg yolks (for 18 eggs, I used 1/3 C milk).

Beat the eggs until the mixture is consistent. 


If it's as dark as the yolk, add more milk. If it's pale like buttermilk or egg nog, add more eggs. It should be the color of generic scrambled eggs (light, sunny yellow).
Add salt and pepper to taste, typically in equal amounts.


When all is ready, preheat a pan (or two, or a skillet) to medium-low heat. Be prepared to turn the temperature down if you're going to make multiple omelettes. Low heat is key for preparing these, since the layer is so thin. Grease the pan with butter, Crisco, spray oil, whatever works. Use a ladle to scoop out the egg mixture. The little minions like a 2-egg omelette, so I scoop a little less than a ladle full. But the bigger minions like 3-egg omelettes, so I scoop a ladle full and then some for them.
Use a spatula to form the egg mixture into a large, flat rectangle on the pan (or cover the entire bottom if it's a circle). As soon as the center area starts to appear dry, add the toppings. Spread them evenly. As soon as the outer edges start to appear dry, fold the omelette from one end to the other.

I typically start with the messy end so the final product looks neat.

Leave the omelette on the pan a few seconds rolled up, to solidify it a bit, then place on a plate and serve immediately.


We typically end up eating in shifts because the first omelettes out would be cold by the time the last ones rolled off, if we all ate together. But for that reason, it's a great weekend morning meal, when everyone's running around doing their own thing anyway.

I like salsa on mine. I've seen ketchup used as well. Sauteed mushrooms and green peppers are great. Any breakfast meat (or cold cuts or pepperoni) is a welcome addition. I am a fan of adding hash browns right into the middle. When I rummage through the fridge and throw in anything I can find, I call it a "garbage omelette".


Back to me...Doesn't he make that look so easy? (maybe it is...I haven't tried since he's got the touch)
I like ham/cheddar. (Cheddar/Bacon/Tomato is good too.)

My girls? Cheese only

What's in your omelet? :)


Tuesday, June 18, 2013

Honey Balsamic Vinegar Roasted Carrots


Here's another delicious side dish.  I've been hunting for things other than just green beans and corn.  It's super easy and very delicious!

I didn't put ingredient measurements, because you really don't need them.  Just sprinkle and drizzle generously.

Ingredients:

Carrots
Olive Oil
Onion Salt
Honey
Balsamic Vinegar

Directions:

1.  Preheat the oven to 400 degrees.  In a baking dish spread out as many carrots as you think your family will eat.  Drizzle olive oil over the carrots.  Sprinkle onion salt or any other seasonings you think would go well.

2.  Bake the carrots for 20 minutes.  Pull them out of the oven and drizzle honey and balsamic vinegar over them.  Flip each of the carrots over.  Bake for an additional 5-7 minutes.


See?  Easy peasy, and even my pickiest minion enjoyed them :)

Sunday, June 9, 2013

Personal Pan Pizza (Pizza Hut Copy-Cat)


At our house, we love Beth's pizza recipe.  We have it at least once a month.  However, my chief minion had a hankering for some deep dish pizza and found this recipe online.  After reading the reviews, I decided to give it a try and it was amazing.  It's a bit more time consuming than the other recipe, but a good deep dish option.

The recipe makes 3 small pizzas (baked in a 9" cake pan or a pie pan).  I've also included the pizza sauce recipe.  Jake really liked it (he said it was much better than our usual Walmart generic brand sauce), but it needs some work.  I plan on tweaking it a bit...

Ingredients:

2 & 1/4 tsp yeast
1 Tbsp sugar
1/2 tsp salt
1/4 cup dry milk
1 & 1/3 cups warm water
2 Tbsp olive oil (for the dough)
3/4 cups vegetable oil (for the pan)
4 cups flour
No-stick cooking spray

Mozzarella Cheese
Pepperonis

Sauce--

8 oz can of tomato sauce
1 tsp dry oregano
1/2 tsp marjoram
1/2 tsp dry basil
1/2 tsp garlic salt

Directions:

1.  Mix yeast, sugar, salt, and dry milk.  Add warm water and allow the yeast to activate for about 2 minutes.  Add in the oil and mix.

2.  Mix in the flour, adding one cup at a time until the dough forms.

3.  Pour 1/4 cup oil into each of your 9" cake pans. (Yes this is a lot of oil, but it kind of boils the crust in the oven and makes it AMAZING.)  Turn out the dough on a floured surface and knead for 10 minutes.  (I only made it 7 minutes before I gave up.)  Divide the dough up into 3 balls.

4.  With a rolling pin, flatten each of the dough balls into a 9" circle.  Place the dough in the cake pans and spray the tops with no-stick cooking spray.  Cover with a plate.  Allow to rise for 1-1.5 hours.

5.  Combine all of the sauce ingredients in a bowl and allow to sit for an hour.  (I'm slightly embarrassed to admit that I grabbed a can of tomato paste rather than sauce, so the picture looks funny.  It should be a lot more soupy.)

6.  Preheat the oven to 475 degrees.  Once the dough has risen, spread sauce onto the crusts and top with pepperonis and cheese.  Bake for 7-10 minutes until the crust is golden and the cheese is melted.