Monday, April 29, 2013

Mexican Rice

Cinco de Mayo this Sunday (and fast Sunday for some of us) - what can be more festive (and more filling) than a big bowl of Mexican Rice? (It's good by itself, topped with sour cream, as a filling in a giant burrito - which is how this Sunday's menu has been voted to go around here - yum.)

I found this recipe years ago on some basic website (cooks.com) in a search to make Mexican rice myself.

        My husband used to make it when we first got married. He learned from a lady in California (where he served a mission for our church for 2 years, spending most of his time among the Hispanic population - he shared the gospel of Jesus Christ with them - and they in return, shared their food with him.)
        But that recipe, like most recipes from a seasoned cook in her kitchen wasn't specific enough for a new wife like me, so I looked for a "real recipe" - with numbers.
        I found one, and we've stuck with it ever since.


 They both start out the same - sauteing the rice in some oil, then adding in the rest, including liquids, to cook until done.


I make mine (per original recipe) in an electric skillet - and I use 5 cups of water for a double batch (2 1/2 for single) - but if you use a pot on the stove top, you have to decrease the water (2 cups for single batch, 4 cups for double).

No matter how much I messed with the temperature to get the pot to cook the same as the skillet, I still needed to decrease the liquid.


The skillet takes about 20 minutes to cook - the stovetop will take longer (sometimes up to 40 min...but my stove top has has a lot of issues lately, so that could be high if you're stove is fully functional and newer.)

It looks uneven when you first unlid it (skillet), but give it a stir...

and it looks great!


Easy Mexican Rice

Printed from COOKS.COM
1 tablespoon of vegetable oil

1 cup of long grain white rice
2 1/2 cups water (2 cups stovetop)
1 tsp. salt
1 tsp. garlic powder (sometimes, I use a spoonful of garlic puree instead while the oil is cooking)
(sometimes I throw in 1 tsp of onion powder too)
8 oz can of tomato sauce 
(This easily doubles - just use 15 oz can of tomato sauce instead)


In a skillet heat oil over medium-high heat. Add rice and cook until lightly browned. Add water and remaining ingredients, bring to a boil.

Cover, reduce heat to "simmer" or low, and simmer until rice is tender. 
(about 15-20 minutes in a skillet, 25-35 in a pot on the stove, at least mine)


I like mine topped with sour cream. This is a very mild rice - nothing spicy, so the kids eat it too. My husband spices his up with some Valentina.


What's on your menu for Cinco de Mayo? :)

Friday, April 26, 2013

Blondies

A few weeks ago, my aunt brought over some amazing bunny-shaped blondies for us to eat, and I had to have the recipe--they were delicious.  She e-mailed it to me, and I immediately tried to make it. 

Unfortunately, I was a little ambitious and tried to make them nice and thick like a brownie.  It didn't work out.  This week I finally got up the courage to try the recipe again (following directions and using a jelly roll pan), and they turned out great--almost as good as my aunt's bunny blondies :)

Ingredients:

2 & 1/4 cups flour
2 & 1/4 tsp baking powder
1/4 tsp salt
1 & 3/4 cups brown sugar
3/4 cup butter, softened
1 tsp vanilla extract
3 eggs
1-2 cups mini chocolate chips

Directions:

1.  Preheat the oven to 350 degrees.  Spray a 15 x 10 inch jelly roll pan with non-stick cooking spray.  Stir together the flour, baking powder, and salt in a bowl and set aside.

2.  In a mixer, cream together the brown sugar, butter, and vanilla extract until smooth.

3.  Add in the eggs one at a time and mix until smooth.

4.  Slowly add in the flour mixture until you have a thick batter.

5.  Stir in as many mini chocolate chips as you like.

6.  Spread the batter in the pan--it will take a lot of spreading because the batter is very thick and will have to be spread thin to cover the entire pan.  I learned the hard way that these blondies must be pretty thin, or the center will not cook all the way through.

7.  Bake for 20-25 minutes until the top is golden brown and a toothpick comes out clean.

I've been searching for some desserts for Jake lately.  He's pretty picky and hates regular brownies.  However, the blondies were a hit with him and Thomas!

Monday, April 22, 2013

Honey Mustard

If there is chicken (nuggets, strips, fried, sandwich, etc) or burgers or hot dogs (yeah, that one is a little weird for this) - my kids want honey mustard!


I can't blame them, it's the favorite condiment of mine too. 
And like me, they're picky about their honey mustard - the kind we like it really a honey mustard dressing.
They prefer this over any store bought honey mustard (dressing)

 So we make it from scratch-ish 
(meaning mayo and mustard are two ingredients - both not from scratch)


Honey Mustard Dressing
Servings: 6* (according to allrecipes.com, my source)
1/2 cup mayonnaise
2 Tbsp prepared mustard
2 Tbsp honey
1 Tbsp lemon juice (I leave that out sometimes)

In a small bowl, whisk together the mayonnaise, mustard, honey, and lemon juice. Store covered in the refrigerator.


*I usually double everything and funnel it into a squirt bottle that I got for under $1. I've never had it go bad.


 I think the lemon juice is important if you're not going to eat it all right away - we've had some in the fridge for months and it was still fine. (as long as the ingredients that make it up haven't expired, the mixture should be fine too.)


Friday, April 19, 2013

Honey Baked Ham


While I was mulling over what to cook this week, I realized that we eat a lot of chicken and a lot of hamburger.  So in an effort to add some variety to the menu, I went to one of my favorite recipe websites and scrolled down their list of pork/ham recipes.  I decided upon this recipe, and I'm sure glad I did, because it was delicious.

Ingredients:

7-10 lb spiral ham (mine was just shy of 7lbs--try to make sure it will fit into your crock pot)
2 Tbsp spicy Dijon mustard
1/2 cup brown sugar
1/2 cup honey
1/4 tsp nutmeg
1/2 tsp cinnamon
1/3 cup water

Gravy/glaze ingredients:

2 Tbsp corn starch
1 Tbsp water

Directions:

1.  Spray your crock pot with cooking spray and put your ham inside.  Mine wouldn't quite fit, so I sliced the top of and put it into the side of the crock pot.  It wasn't super pretty, but it worked.  The ham be so tender that it will fall apart when you remove it from the crock pot anyway.

2.   In a sauce pan, prepare the sauce by heating the mustard, sugar, honey, nutmeg, and cinnamon on medium heat until boiling and allowing it to simmer for 2-3 minutes, stirring often.

3.  Pour the water into the crock pot and then drizzle the sauce over your ham.

4.  Cook on low for 6-8 hours.  (I did 8 hours, but there were a couple of blackened places on the ham that still tasted good, but I don't typically eat blackened food, so next time I'll try 6 hours for a 7lb ham.)

5.  Remove the cooked ham from the crock pot.  To make the gravy glaze, pour the leftover sauce (from the crock pot) into a pan and heat on medium.  I used a sieve to keep the chunks out.  Add the cornstarch and the water.

6.  Heat until boiling while continually whisking until the "gravy" thickens.  Pour the glaze over your ham and potatoes/rice and enjoy!

I forgot to get a picture of the cooked ham in the crock pot, because I was in a hurry.  I used the missionaries as guinea pigs, and they thought it was delicious.  Jake loved it, and my mini minion ate tons of the sweet, glazed rice.  The leftovers will be perfect for some little pork sandwiches.

Monday, April 15, 2013

Breakfast Burritos

Life seems to always get busy [again...or maybe still?] after spring break -

...I think we need more sandwich & wrap recipes around here - so continuing on last week's Italian Sandwiches (can't wait to try those next week on the menu!), here's another one we really all like around here - we have breakfast for dinner around here about once a week.

A recipe is hardly needed; it's more the idea for a meal - but I do have tips.

My breakfast burritos. (literally, these were mine) :) and they were so good.


They basically have 3 types of ingredients (now) - eggs, cheese, and meat - rolled up in a tortilla and browned on a skillet - first seam side down, then flip it over. (Skillet - the kind you cook pancakes on - about medium or medium high or around 350 or 375)


How I do them:
My ratios of ingredients:
  • 14-18 eggs (2/person and then some)
  • 8 oz ham (sliced, packaged or diced, packaged - or leftover 'real' ham)
  • 8 oz cheddar, shredded
  • 1/4 - 1/2 pound of sausage (I cook the entire pound and then use what I want and save the rest...or use it leftover from something else I needed a partial pound for - like pizza, breakfast casserole, omelets, pasta, etc)
  • 12-16 oz bacon (1 slice/burrito)
  • 14 tortillas (2/person) - for burrito sized, 2/adult, 1/child (even for me, that was a little too much)
  • (if you like potatoes - 1/2 bag of cubed hash browns)


Version 1 - simplicity 
(mix it all together and wrap it up!)
Cook the potatoes in a little oil (read the package for instructions).
Put cooked potatoes in large bowl.

Cook sausage (if you pan fry your bacon, you can do it before/after sausage). If you microwave your bacon (that would be me), start that now too.
Put meat crumbled in same large bowl with potatoes.

Scramble eggs 
Put these in bowl too and pour in cheese - as much/little as you like and stir everything together.

tip: I've tried cooking some of these together and the eggs always take FOREVER to cook with other things, so I just do everything one after the other.

Fill each tortilla about this much:

Roll up (ends in, short side covering filling, then roll) and place seam side down on skillet (spray with oil if you want). After a few minutes - or after you've filled the entire skillet with burritos, start with the first, flipping as it's browned. Pull off once 2nd side is browned....into a pile:


Version 2 - short order cook
(layer it)
Still cook everything one at a time (my preference) - eggs last because they get cold so fast.

But keep each item separate - I used ham right out of the package and sausage that was leftover in the fridge, and bacon cooked in microwave (& no potatoes), so there were no extra dishes keeping everything separate. 

Layer each item in tortilla (per request) and roll in same manner - tucking in ends, folding over near side and rolling towards far side. Then, grill each side (seam side first) on skillet until browned.

tip: If you're cooking everything and want to do it one after the other in the same pan and save on dishes, just put the cooked ingredients on dinner plates and as they clear off in compiling the burritos, reuse those plates for dinner.

I like this version because I am a short order mom-cook of a picky little kind-of-big family :)
 ham, sausage, bacon, eggs, cheese

ham, bacon, eggs, cheese

ham, eggs, cheese

Variation: Add some hot sauce (Valentina in our house)
or anything else you might eat with eggs or breakfast - ketchup, sawmill gravy, etc

Another variation - Breakfast Calzones - 
These are a treat b/c in addition to the dough (I just use my favorite white bread dough at the time), you also have to cook all the parts and get it to stay while you fold and seal the edges...not a quick meal to make- but it is a good take it with you meal. :)


Thursday, April 11, 2013

Italian Sandwiches

Here's another fancy sandwich recipe to add to the "quick and easy dinners" section of your cook book.  They're really tasty, and you can whip them up in 20 minutes.  I found the recipe on Pinterest--here's the link to the original.

Ingredients:

1 loaf of french bread
2-3 tbsp butter
2 eggs
3/4 cup milk
1/2 cup bread crumbs
1/2 cup Parmesan cheese (the powdery kind)
Deli meat (Jake prefers ham)
Slices of cheese (provolone is my favorite)

Directions:

1.  Preheat your oven to 425 degrees and slice your french bread loaf.  I like to keep the slices in pairs so that they are easy to match for the sandwiches.  Put the butter in a large baking dish and let it melt in the oven.  You should have enough melted butter to lightly coat the bottom of the pan.

2.  In a wide bowl (or pie pan), beat your eggs and milk together.

3.  In another wide bowl, mix the parmesan cheese and bread crumbs.  Depending on how many slices of bread you get out of your loaf, you may need more cheese/bread crumbs.  I'd rather run out and have to add a little more than have too much and have to throw it out at the end.

4.  Dip one side of a piece of bread in the milk/egg mixture.  Then dip it in the bread crumb/cheese mixture.  Put the wet side face down in the butter of your baking dish.

5.  Place a slice of cheese and a couple slices of deli meat on top of the bread.  Cover it with another slice of french bread that has been coated in the milk, egg, cheese, and bread crumbs.

6.  Repeat steps 4-5 until you have enough sandwiches to feed your family, or until you run out of french bread slices.

7.  Bake the sandwiches for 5-8 minutes.  Take them out of the oven and use a spatula & fork to flip them upside down.  Be careful not to let them fall apart.

8.  Bake them for another 5 minutes.  Turn your oven on broil for the last 2-3 minutes until they are golden brown.

Try dipping the sandwiches in pizza or spaghetti sauce for even more flavor!

Monday, April 8, 2013

Mom's Macaroni and Cheese


This is and has been my favorite food since I was a little girl - I love almost all macaroni and cheese's (I have lost my desire for the box kind in the past 10 years of making too  many boxes for my kids!), but MY MOM's is my favorite macaroni ever.

And although I have learned to make it  - and it is good - there is nothing compared to going home and having mom's - which I will probably never be able to compete with. :) yum...

Here's the basics (recipe below):
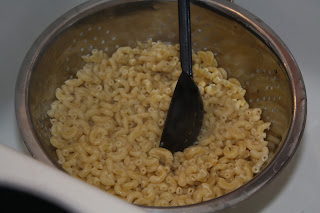
Boil a box of noodles (16 oz). Shred a pound of cheese (and then some if you want it really good!)


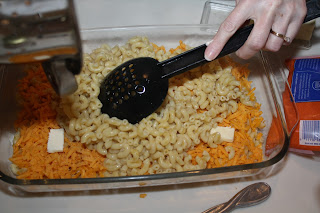
Layer: 
noodles & cheese

butter

salt/pepper (before or after butter)

REPEAT LAYERS:
noodles
cheese
butter
salt/pepper


 Then, to top it all off, mix up eggs (2) and milk (enough to make 2 cups)


and pour over the top.

(My mom added about another cup of milk - 2%)

Then, bake - 350 for 30 minutes.
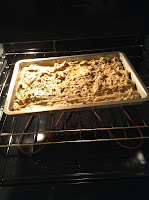
 (My oven can't take more than 25 minutes or the top will usually burn)


And this part is important - cover it (aluminum foil) and let it sit 
(My mom used to make it before church and then let it sit and reheat it in the microwave (no foil!) when we got home - not sure if this was "food safe", but it was SO good and perfect)

Today, she let it sit probably 30 minutes.


Recipe:
16 oz macaroni noodles, cooked and drained
16 oz cheddar cheese (I like mild, but my great grandma used to use sharp and hers was good too, just with a different flavor) - mom probably used another 4 oz of cheese today

2 eggs
about 3 cups milk (2% is good, skim will do - but it's not as good) :)
butter (about half a stick)
salt/pepper

Layer the noodles and cheese (seasoning with pats of butter, salt, and pepper on each layer) in a 9x13 (two layers). 
Beat 2 eggs, then add enough milk to make 2 cups. Pour over entire casserole. Add enough milk so it is wet (about another cup).

Bake for 30 minutes at 350. After baking, cover and let sit. 

(If you eat it right away it's too runny and doesn't stay together well. You can decrease the milk to avoid this if you need to eat it right away, but then you've lost some of the rich moist flavor. Trust me. I've tried. It's not worth the time saving.) :)

You can also half this recipe for an 8x8 or 9x9 baking dish.

*This is an excessive amount of pictures for a seemingly simple side dish, but if you tasted mom's you would know
1) the pictures don't do the taste justice and
2) it takes practice to get this recipe as good as she's got it!